
Bei der Meldung KVM nicht aktiviert im BIOS virtualization einschalten
ISO von der Webseite laden und mit etcher boot stick erstellen (UEFI) funktioniert
ssh root@<ip/hostname of your sever> -L 8006:localhost:8006 dann https://localhost:8006
Troubleshooting
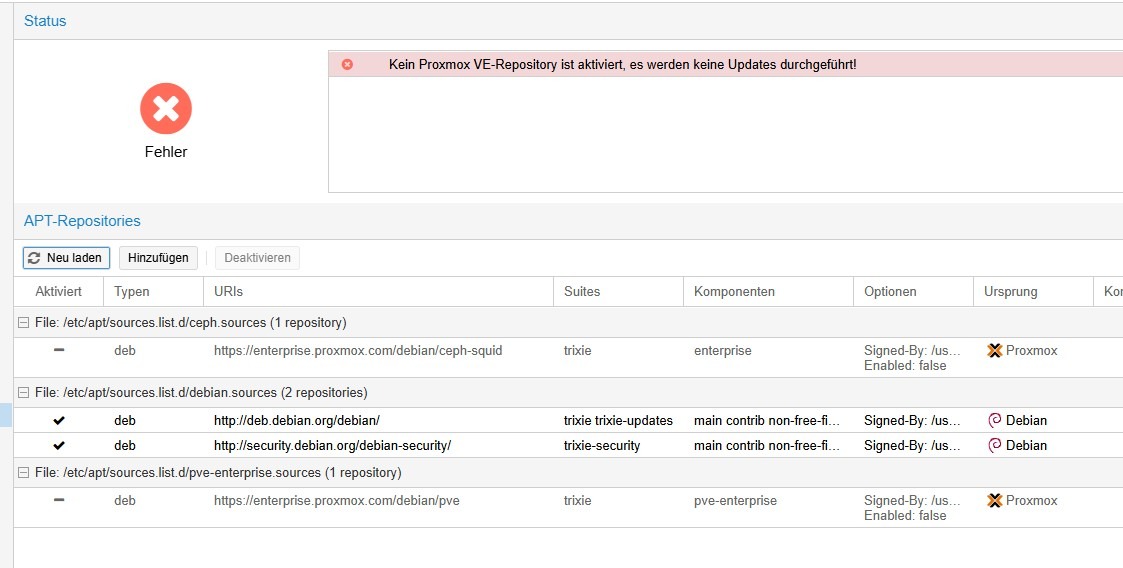
Den Fehler Paket-Datenbank aktualisieren reparieren.

Instanz unter dem Datacenter auswählen.
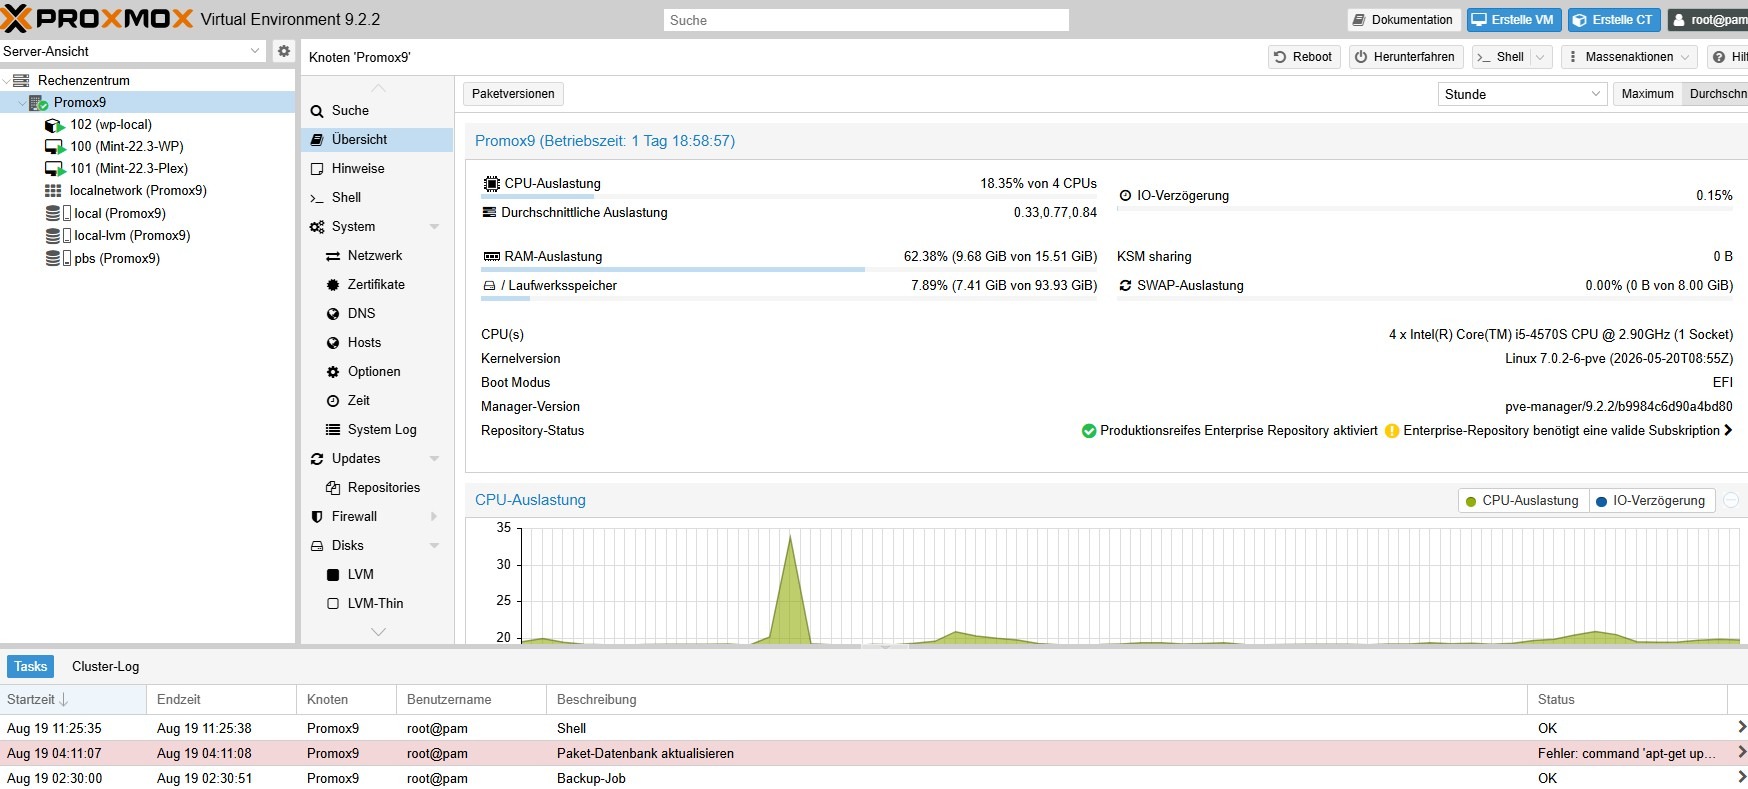
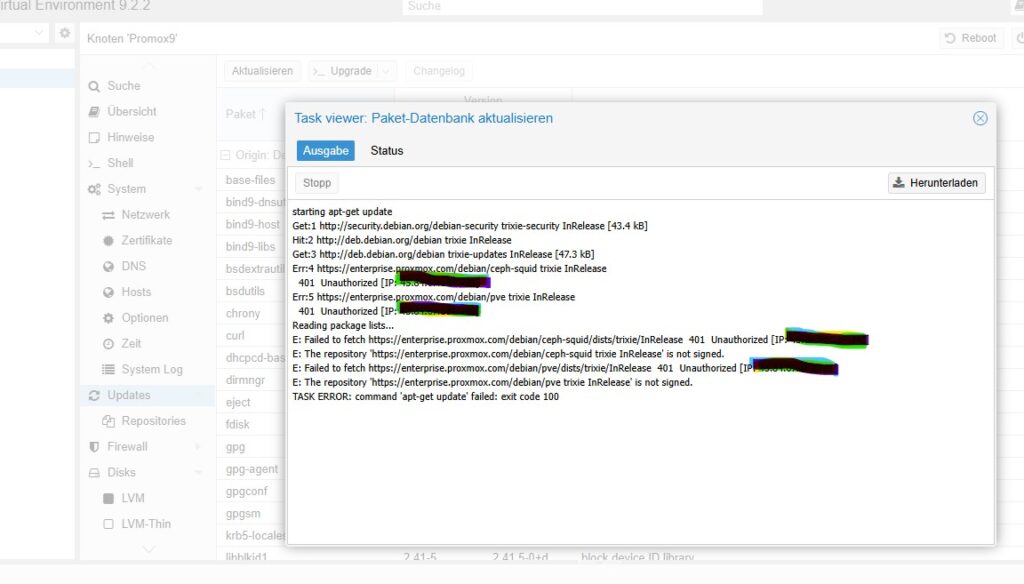
Nach den Auswählen von Updates und dann Aktualisieren erscheinen folgende Fehler:
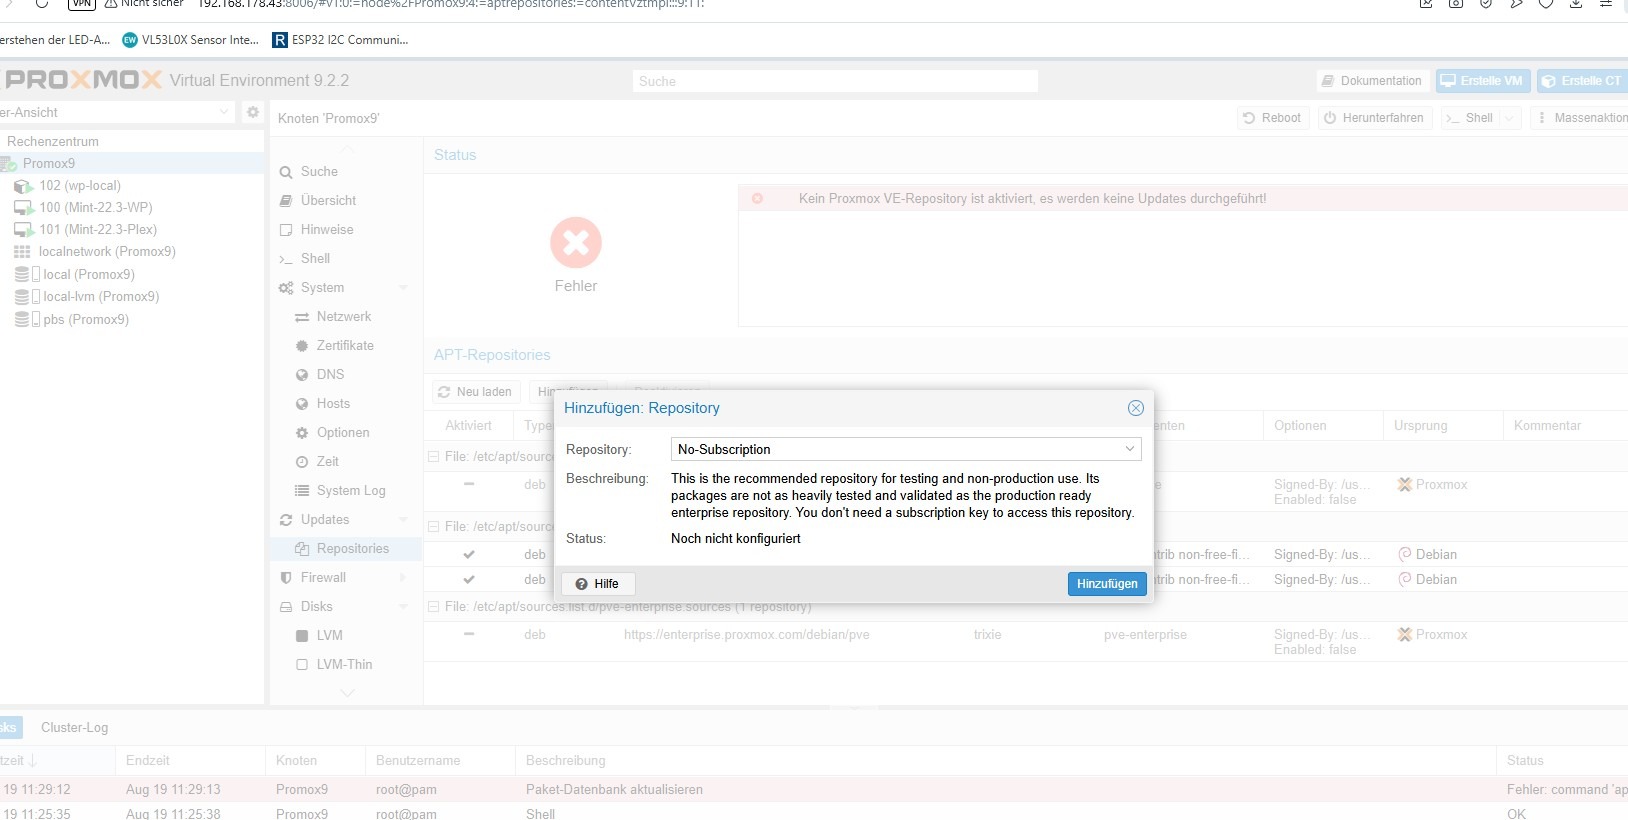
Gehe zu Repository
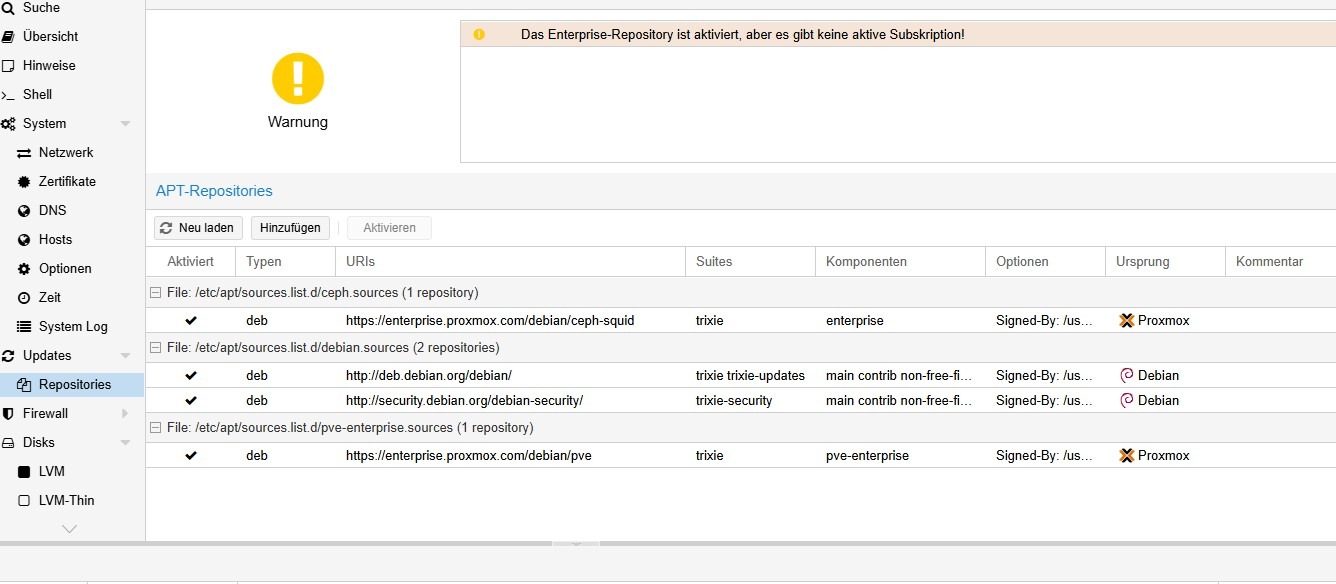
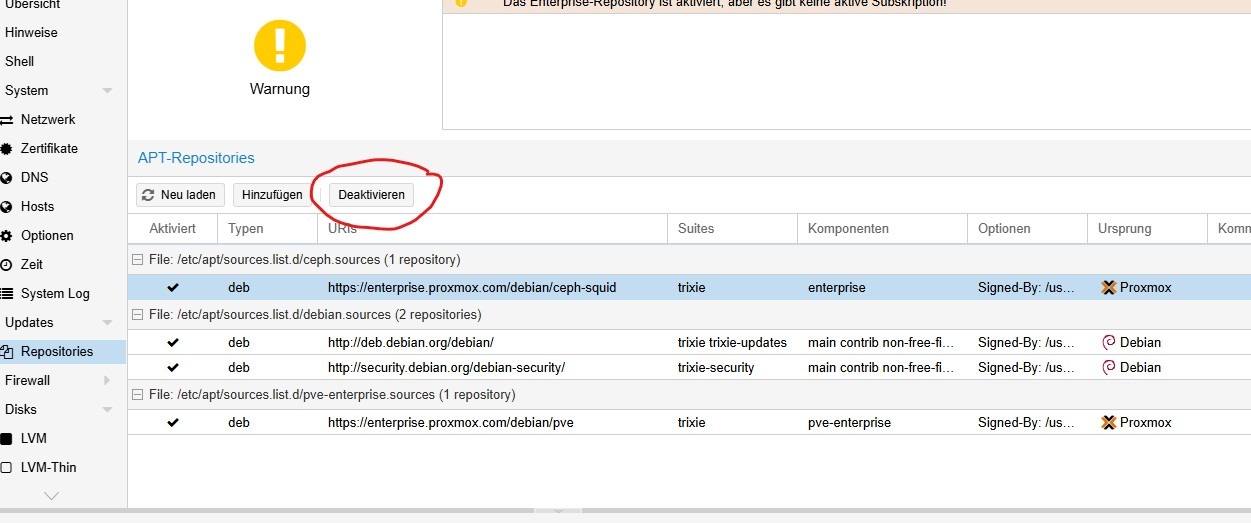
Hinzufügen wählen
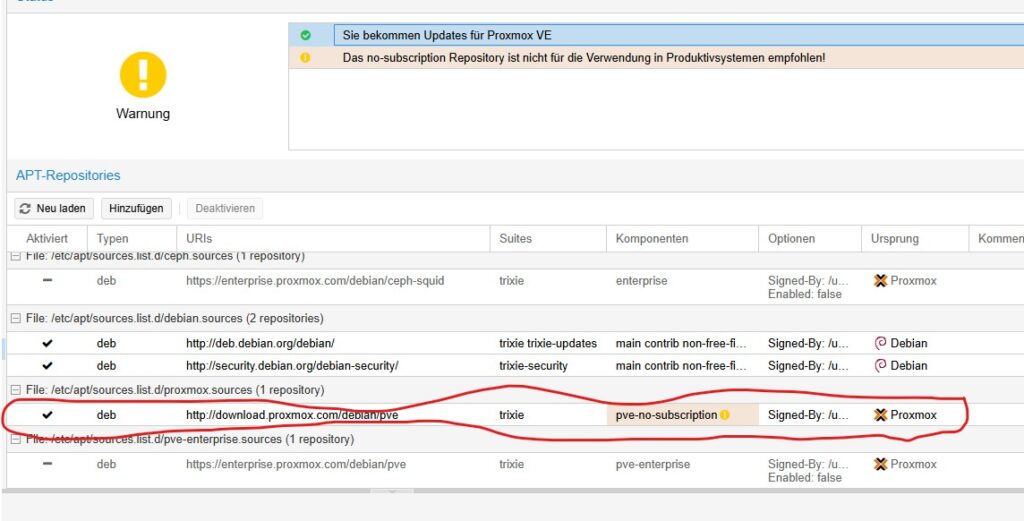
Auswählen Updates und dann Aktualisieren
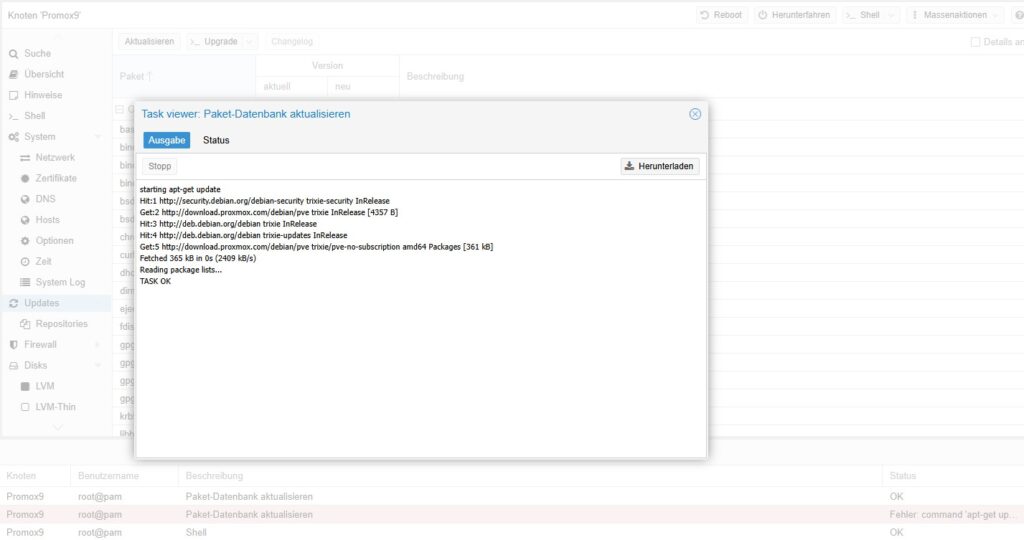
Shell öffnen
# Paketquellen Updaten
apt update

# Pakete installieren
apt dist-upgrade
shutdown -r
Proxmox (Minor) Updates via Kommandozeile einspielen
Man kann die Updates auch über die CLI durchführen:
# Paketquellen Updaten
apt update

# Pakete installieren
apt dist-upgrade
Wichtig: Niemals apt upgrade verwenden, siehe wichtiger Hinweis in der Artikel-Einleitung.
Upgrade von 8.4 zu 9.2
Eigentlich geht es darum eine WebDav Installation sowi eine Home Assistent Installation auf 9.x zu bringen.
Hier scheint die richtige Vorgehensweise Proxmox 9.x frisch zu installieren und dann Backups vom Proxmox Backup-Sever einzuspielen.
Da auch versuche mit Clonezilla wenig Erfolg versprechen sind, werde ich die Originale SSD gegen eine neue SSD tauschen.
In der shell ausführen pve8to9 dann pve8to9 –full
How to check if systemd-boot is being used — and how to safely remove it
Step 1: Check which bootloader is in use
(if it is grub for example it is saffe to remove systemd-boot)
Run the following command to inspect your current EFI boot entries:
efibootmgr -v
Look for an entry like this (with an asterisk * and matching BootCurrent number):
Boot0012* proxmox HD(…) /File(\EFI\proxmox\grubx64.efi)
If the entry points to a file under \EFI\proxmox\ (e.g. grubx64.efi, shimx64.efi), then your system is using GRUB, not systemd-boot.
️ Step 2: Inspect the contents of your EFI partition
List the directory structure of your EFI partition:
ls -lR /boot/efi/EFI/
Expected output for GRUB-based systems:
/boot/efi/EFI/<br>├── BOOT/<br>│ └── grubx64.efi<br>├── proxmox/<br>│ ├── grubx64.efi<br>│ └── grub.cfg
If there is no EFI/systemd/ folder, systemd-boot is not in use.
Step 3: Remove the systemd-boot package
Even if systemd-boot is not being used, Proxmox’s upgrade checker will throw an error if the package is installed.
To verify if it’s present:
dpkg -l | grep systemd-boot
If installed, remove it with:
apt purge systemd-boot
You can also remove related leftovers (optional):
rm -rf /boot/efi/EFI/systemd
Result
Once systemd-boot is uninstalled and no systemd-related boot entries or files exist, the Proxmox 8 to 9 upgrade checker (pve8to9) will no longer report this warning.
Your system will continue booting via GRUB without issue.
Proxmox Backup Server
Installation mit USB Iso Boot stick. Empfehlung IP vorher reservieren.
Vernüftiges Backup nur mit ZFS Pool
Voraussetzung ZFS Volume erstellen
Anzeige Disks
lsblk
Partition löschen
sgdisk –zap-all /dev/sdX
Danach ZFS Volume anlegen
Storage hinzufügen
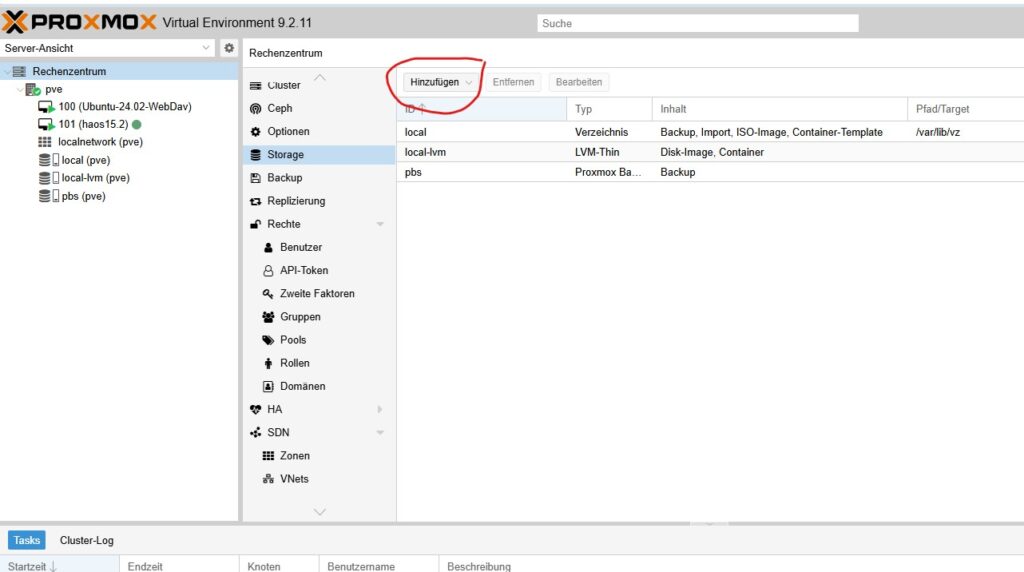
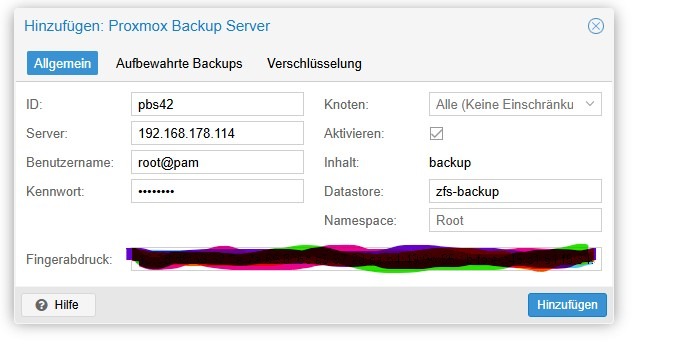
Datastore aus der Backupserver Konfiguration auslesen. Fingerabdruck einfügen vom Backup Server.
Backup Konfigurieren
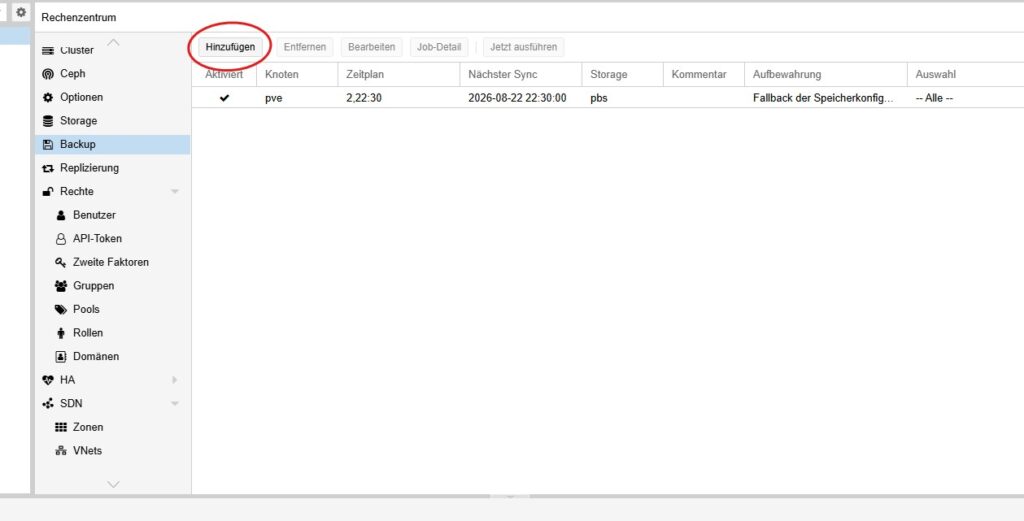
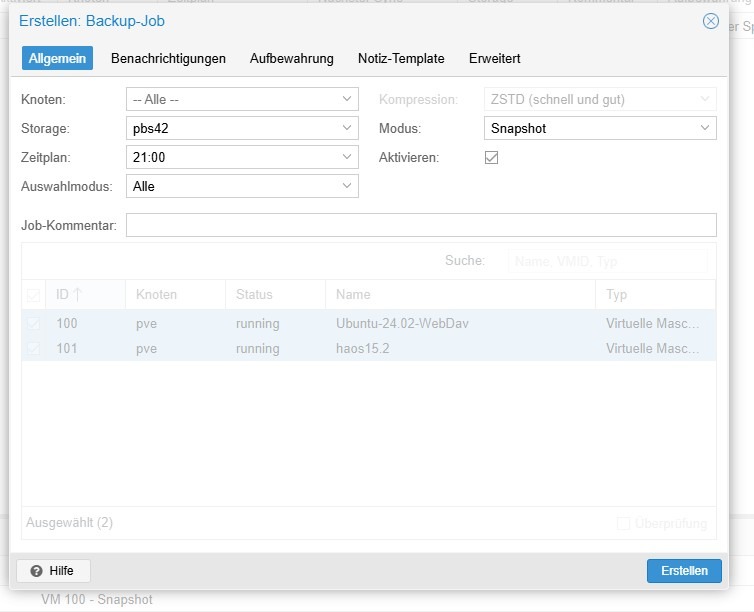
Erstellen und dann Testweise ausführen
Update ohne Subskription einrichten
nano /etc/apt/sources.list.d/pbs-enterprise.sources
Standart:
Types: deb
URIs: https://enterprise.proxmox.com/debian/pbs
Suites: trixie
Components: pbs-enterprise
Signed-By: /usr/share/keyrings/proxmox-archive-keyring.gpg
Zum Deaktivieren des Enterprise-Repositorys wird die folgende Zeile ergänzt:
Enabled: false
Types: deb
URIs: https://enterprise.proxmox.com/debian/pbs
Suites: trixie
Components: pbs-enterprise
Signed-By: /usr/share/keyrings/proxmox-archive-keyring.gpg
Enabled: false
No-Subscription-Repository einrichten
nano /etc/apt/sources.list.d/proxmox.sourcesTypes: deb
URIs: http://download.proxmox.com/debian/pbs
Suites: trixie
Components: pbs-no-subscription
Signed-By: /usr/share/keyrings/proxmox-archive-keyring.gpg
apt update
apt full-upgrade